Everything You Need to Know Before Microblading Your Eyebrows
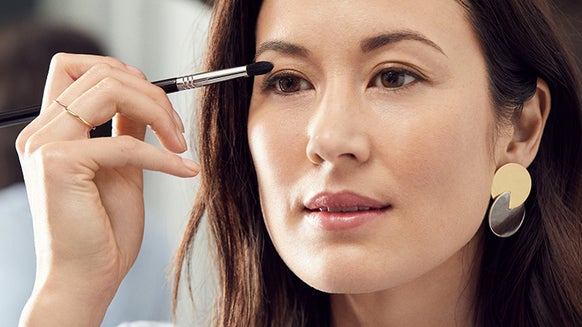
For most of us women, eyebrows are an important part of our identity. Which is why we spend so much time (and money) plucking, waxing, threading and filling them in. That said, we aren’t opposed to something more permanent. The only problem? Eyebrow trends (and personal preference) tend to ebb and flow. So, permanent tattooing is not an ideal option—especially for those who don’t want the life-long commitment. This is the reason microblading, with its low-maintenance and semi-permanent appeal, has quickly become a go-to beauty treatment for women looking to obtain perfectly shaped (and filled in) eyebrows with little to no effort. And albeit it being on the pricey side of the spectrum, this arch-perfecting procedure has received rave reviews from beauty experts and enthusiasts alike.
Curious to know if microblading is right for you? We gathered everything you need to know before microblading your eyebrows, ahead.
1. It uses the same technique as a traditional tattoo, but they're not the same.
Similar to getting a tattoo, microblading uses small needles to deposit pigments on your skin. “Microblading is a manual tattoo technique designed to create natural hair-like strokes,” says Liz Carey, Esthetician, and owner of Mascot Aesthetic, a well-being boutique in Santa Clarita, California. “We use a series of small needles which look like a blade to deposit pigment into the upper dermis of the skin, making it a semi-permanent procedure,” she adds.
“The difference between microblading and traditional tattooing is generally the depth the pigment is placed in the skin,” explains Carey. “When done correctly, microblading [uses] pigments that are designed to break down over time, allowing them to completely fade away. Traditional tattooing is done using a machine [and] is generally designed to work deeper in the skin, creating a brow that will last longer over time,” she says.
2. It's a two-part process.
According to Carey, “The initial appointment is generally two to two-and-a-half hours long from start to finish. The microblading process itself takes about 45 minutes to one hour.” Carey’s sessions all start with a discussion about expectations and desired brow look. “From there, I create a template based on my client’s facial structure and features,” she notes. “At this point, my client and I will make any adjustments (if needed) and they will ‘OK’ the shape,” she adds.
Following the initial appointment, Carey asks her clients to come back six to eight weeks later to see how the skin healed (as everyone heals differently). “At that point, we can make any adjustments needed such as color and density,” she explains. “The [follow-up] appointment is generally one to one-and-a-half hours long,” she confirms. On top of a follow-up session, Carey recommends an “annual touch-up appointment to maintain the desired brow.”
3. Expect a little bit of pain.
“Generally speaking, you will have little to no discomfort but may have some redness and mild swelling after your microblading appointment. But it’s generally mild enough that you won’t notice it,” Carey explains. “Most artists use a topical numbing cream before the procedure, [so] you shouldn’t feel any pain.”
Carey uses a formula that is 5% Lidocaine, which is used to temporarily numb and relieve pain. She allows the cream to work its magic for about 15–30 minutes before she begins to microblade. “If you experience excessive swelling, redness or discomfort, definitely contact your artist and see a physician,” she advises.
4. Microblading is not for everyone.
It’s important to note that not everyone is a good candidate for microblading. “Women who are pregnant or nursing will not be good candidates,” says Carey. In addition, “Those undergoing chemotherapy are recommended to finish treatment as the risk of infection could be much greater,” she adds. “Those being treated by a physician or taking medications such as blood thinners are recommended to speak with their doctors to make sure the procedure is right for them,” she warns.
5. Your skin type can affect results.
“Microblading can definitely benefit certain skin types better than others, so it’s important to do your research and find the right technique for you,” explains Carey. “I find that drier skin types have the best results [as they] tend to retain pigment the best and keep the crispest strokes. Oilier skin types will work, as well, but tend to heal a little softer and less crisp [possibly due to more oils in the skin],” she adds.
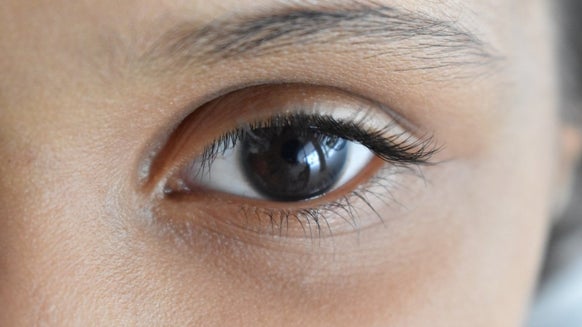
6. Microblading won't stop your natural hair growth.
One of the top myths being circulated about microblading is that it impacts natural hair growth---it doesn't. “When done correctly, microblading shouldn’t have any effect on your natural hair growth,” notes Carey. “However, it can sometimes stimulate hair growth—which for most is a win-win,” she adds. While the boost in hair growth might require more grooming, it can help create a fuller look.
7. Your microblading artist can make or break your look.
“When deciding on an artist or facility, it’s important to do your research, [as] different states have different laws and regulations,” says Carey. “When researching an artist, there are a few other important factors to keep in mind—and safety is an ultra-important one. Everything I use is ‘one-time use’ and completely disposable,” explains Carey. Before booking your appointment, find out this safety-specific point to ensure a cleaner, more successful experience.
In addition to credentials and cleanliness, Carey recommends asking to see an artist’s work. “It’s important to see not only before and after, but healed photos, as well,” she emphasizes. Choosing a well-trained artist is not only important for safety, but also for your entire microblading experience. “When microblading is done correctly, it is considered semi-permanent,” notes Carey. “When done properly, microblading should last anywhere from 12 to 24 months (depending on skin and lifestyle). If done incorrectly, the pigment could migrate in the skin and become more permanent,” she warns. “I can’t stress enough how important it is to do your research on the artist you choose,” says Carey.
8. Invest in an artist who suits your style.
It’s no secret that microblading is an expensive treatment. And according to Carey, the price will definitely range depending on location and demographics. “I would say the general range may be $500 to $1,000,” she notes. Carey recommends doing your research and investing in an artist who best suits your style. “While I completely respect that everyone might have a different budget and some artists are more expensive than others, honestly take your time [and] save if you need to,” she advises.
9. The healing process can take up to a month.
“The first couple of days, the color is definitely noticeable, as it [is] bolder, darker and sharper. Around day four [or] five, you may start to experience some mild flaking,” she notes. As for scabbing, Carey says she tries to avoid that, but it can happen as everyone heals differently. “It is very important not to pick! Picking the flakes or scabs prematurely can pull out the pigment and lead to loss of or no color in those spots,” she warns. According to Carey, the healing process can take a full month, as “it takes the skin about a complete 30 days to regenerate.” Generally speaking, the 30-day mark is when the “true color will show itself,” she adds.
10. Follow after-care instructions for best results.
“During [the healing period], you should avoid working out (excessive sweat), submerging your face in any water and applying any cosmetics on the brow,” says Carey. “I generally advise my clients to use a little lukewarm water and a cotton round to wipe down their new brows two to three times a day,” she adds. “I feel this is an important step in order to keep them free and clear of any lymph fluid that may collect due to our fresh little wounds,” she says.
After wiping them down, Carey has her clients apply a barrier cream that she supplies them with. “Depending on the client’s skin type, it may be [applied] more or less than two times a day. Oilier skin types generally need a little less. Drier skin sometimes [requires] a little more,” she notes.
11. Avoid the sun and products with retinol post-treatment.
Following the treatment, there are a few necessary lifestyle choices to avoid. “For best results, it is recommended to keep your brows out of direct sunlight or tanning beds,” notes Carey. “SPF is always recommended—however, keeping your brows protected will keep them looking their best even longer,” she adds. On top of that, some product formulas are better left unused. “Retinols and AHAs are wonderful products, but as with any product that is designed to exfoliate or speed up our cell turnover rate, it will speed up the life of your new brows if used near the area,” warns Carey. “Avoid using these products on the brow area for the longevity of your brows,” she advises.

$111.00

From the latest hair and makeup trends to the best solutions for your skin issues, we've got all your beauty concerns covered!